Wednesday, October 26, 2016

Christmas Star Shaker as an Ornament or Gift Tag

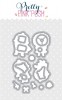
I'm having so much fun with these Stitched Stars from Pretty Pink Posh that I decided to create something my grandkids could make as they enjoy crafting with me. My goal again was something fast and easy since they have limited patience before they want to move onto next project.

Here, I created this star shaker which actually has silver glitter both in front and in back. This can be turned into a Christmas ornament or gift tag. The best part, it's simple to create several of them.

To create them, I used the Stitched Stars and die cut two of them using some glitter fun foam and than added some clear acetate to each one and put aside. At this point, I decided to add a sentiment from the Holiday Greeting set using black Stazon ink and stamped directly onto one of the acetates.

This set has such wonderful Christmas setiments and love the fun fonts. Currently, it's being offered for free with purchase of $100 shopping at Pretty Pink Posh.   

Next, I took the same die and ran it through the die cutting machine using white fun foam for the center just as I would when creating shakers. Plus, my grandkids love using the die cutting machine so they enjoyed this part. 

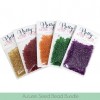
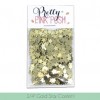
From there, I glued the white fun foam onto one of the glittered stars and added these new Autumn Seed Beads which are fun to shake and love the new colors.  Here I used the red and green.

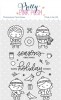
Since I wanted to add a little more detail, I pulled out this cute little wreath and bow from the Christmas Friends set and used the Coordinating die to help me cut it out. Perfect for kids to color. 

Lastly, I added some strings in both red and silver. At this point, you can create a loop instead and add to the tree or add to a gift bag. 

SUPPLIES:

Tuesday, October 25, 2016

Peek A Boo Shaker for Halloween


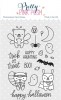
Loving these little critters and images from the Halloween Friends set from Pretty Pink Posh so I thought to create some Halloween cards for family and friends based on the same tags in my previous post. 

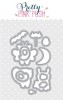
This way, I could mail out a little surprise as it uses the Peekaboo feature and for those local, Halloween Treat bags. Also, used the Coordinating die to help me cut out all of these little images which made it go faster    

Once again, I played with some distress ink and a stencil to create the background by first adding the ink onto the stencil, spritzing it with water and applying the stencil directly to an A2 size water color panel. 

Repeated the process for all three colors: Mowed Lawn, Scattered Straw, and Spiced Marmalade. If you would like to see previous post using this technique, you can click here. Each time I use this technique, I get a different result, so if anything have fun with it and play with more or less colors.

Love these little tags from the Stitched Essentials 1 collection for their size and how each one is shaped slightly different. Also, I was able to die cut all three tags at once and use the new Peekaboo Windows as they work so well with them. 

Again, these tags are easy and fast to create and didn't take much time to put this Halloween card together. More details on how I assembled these tags can be found on my previous post. For the grass hills, I used the Stitched Borders 4 along with some Jellybean card stock.

Hope you enjoyed and give them a try as they are fun to make. Now thinking these little tags might come in handy for Christmas time as well. For the final touch, I did add some 4mm clear droplets to add little more detail to the background plus I love how they look like water drops.

SUPPLIES: