Friday, October 14, 2016

Halloween Time with Friends

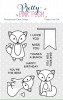
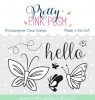
Halloween is such a fun and exciting time, so I decided to create a Halloween scene using this adorable new Halloween Friends set from Pretty Pink Posh and play around with some distress ink along with some other favorite dies of mine. 

For the background, I did some ink blending using Dusty Concord and Seedless Preserves distress ink and thought to add a little more shimmer and splatters by spritzing a mixture of water and perfect pearls. 

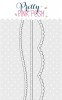
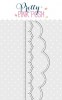
Next, I added the Picket Fence to the base card using some Grout Gray card stock before adding the hills. To create the hills, I used the Scallop Borders and die cut two pieces using black card stock to overlap them together and added some foam mount underneath the top one to give it some dimension.

Right before I glued down the top hill, I realized I didn't have a sentiment, so I looked at the different sentiments and thought this one would be perfect for this card, so I heat embossed it using some white fine powder from Ranger.

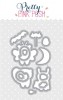
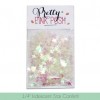
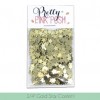
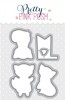
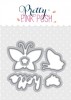
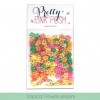
From there, I had some fun coloring these adorable little images using my Copic markers, especially the little critters who have their costumes on. I thought to myself.....they are ready to go trick or treat. Also, the Halloween Friends Coordinating die helped me cut them out easy and fast. To complete the scene, I added these fabulous new Gold Star Confetti  which I love and have been using on every card so far.

SUPPLIES:

Thursday, October 13, 2016

Pretty Pink Posh New Release Blog Hop Day 1

Welcome to Day 1 of the blog hop showcasing Pretty Pink Posh's latest release filled with exciting new stamp sets, sequins, and dies.  Plus, there is a free gift offer you don't want to miss. Details are below. 

You should have arrived from the talented Kelly Latevola, but if you get lost, no worries, there is a complete line up list below so you can stay on track during the blog hop.   
I'm excited and thrilled to share these two cards with you today, so let's get started.

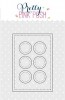
It's so much fun to create shaker cards so I couldn't resist but to use this wonderful new Stitched Pieces die from Pretty Pink Posh to create one. I love the three window frames down the center panel along with the rounded corners and stitching detail.  

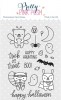
I'm having so much fun playing with this new Halloween Friends set since all of the images are so cute, so I decided to stamp several of them onto black cardstock and heat emboss using some white powder.  

From there, I stamped this spooky spider directly on the top and bottom white panels and selected one of the many sentiments for the center. 

Who could resist stars? I think it's perfect for Halloween and many other occasions, so I added several new Gold Star Confetti and mixed it with the new Iridescent Star Confetti. I love how they sparkle combined together....don't you? 

Next, I colored in these adorable little critters all dressed up in their costumes and used the Halloween Friends Coordinating die to help me cut them out.  Popped them up using some foam mount and it's ready to go. 

Moving onto the second card.....

I must say, this new Stitched Stars die is wonderful, so I decided to create another shaker card again along with using the cute images from the new Halloween Friends set.  
  
For the background, I did some ink blending using Mustard Seed, Spiced Marmalade, Dusty Concord, and Chipped Sapphire distress ink. Also, to add a little more shimmer and splatters, I spritzed a mixture of water and perfect pearls. 

I love the new Autumn Seed Beads collection as there are 5 colors to choose from and all of them have such a wonderful sparkle, so I pulled out the purple and orange ones to add inside the shaker, but before doing so, I stamped the spooky (cute) little spider in the center.

From there, I colored these adorable little ghosts, pumpkins, bat, and moon using my Copic markers along with using the Halloween Friends Coordinating die to help me cut them out.  To complete the scene, I added these fabulous new Silver Star Confetti 

Let's continue celebrating with your next stop with the talented Nina-Marie Trapani 

GIVEAWAY! During this 2 day blog hop event, there will be (4) $25 Gift Certificates up for grabs (2 winners on each day) to shop at Pretty Pink Posh 

Winners will be picked randomly along the blog hop (comments must be left by 11:59PM PDT on 10/20/16), and will be announced on the Pretty Pink Posh Blog 

Here is the complete list of Blog Hop Participants:

Make sure to take advantage of the Free Gift Offer as this stamp set is amazing in person! 


Sunday, October 9, 2016

Sending Hugs and Get Well Wishes

I love when you can get more use out of your dies, so today I wanted to show how to create your own background using these cute Stitched Essentials 1 from from Pretty Pink Posh as you can create so many things with all of the dies included in the set with basic shapes, tags, and more. 

To start this mini card, I pulled out some white card stock and cut a 5" x 7" piece and folded in half so the finish size would be a 3.5" x 5" inch card. I put it aside while I worked on creating my background.

To start the background, I first cut a piece of white card stock measuring 3 1/4" x 4.75". From there, I selected this cute tag and seperated the die to only use the circle and ran it through the die cutting machine six (6) times using various designer papers. 

Next, I placed the circles randomly onto the card stock and trimmed off any excess as I placed a couple of circles past the cardstock edges.

From there, I moved onto creating the little shaker by die cutting this cute tag using kraft cardstock as well as fun foam. In addition, one (1) white stitched circle was cut. 

Next, I flipped over the tag (Kraft) and first added some acetate using some glue to cover the open circle. From there, more glue was added on top of the acetate to adhere the fun foam. 

Again, I prefer using glue as it allows me to move it slightly to match perfectly, but you can use any adhesive. Afterwards, I lay a clear block on top of it for a few minutes to allow the glue to dry. 

Sometimes I'll create the shaker to be on it's own while other times, I'll create the shaker directly onto the card. Here, you can see I decided to create the shaker to be independent. 

To do this, I used the same tag from the  Stitched Essentials 1 setand ran it through the machine using white card stock and added the previously cut stitched circle on top. Instead of guessing where the circle goes, I did die cut another tag to place on top to use as a template. Once, the circle was added, I removed the template.  

I love the iridescent sequins collection as it provides an extra sparkle and based on how the light hits, it's shows off so beautiful, so I pulled out one of my favorite colors:  4mm Ballerina Pink sequins. 

From there, I added some more glue onto the tag before adding the top onto it. Again, I do add a clear block for a few minutes while the glue dries.  

To add some more dimension, fun foam was added under the background card stock before adhering it onto the card base.

Once again, I pulled out the Birdie Friends stamp set as it has this adorable little chick who appears to be sending a little kiss along with using the Birdie Friends Coordinating die to help me cut it perfectly. 

Final touch was adding a little gold bow by using the Twine and Bow die and added one of my favorite sayings "Hugs", again from the Birdie Friends stamp set 


Monday, October 3, 2016

SPDMIX15 - Sending Birthday Wishes To My Sweet Daughter

Two things my daughter loves, wine and sparkles, so I pulled out this adorable Wine Not stamp set from Sugar Pea Designs and used the Sketch from the Mix It Up challenge SPDMIX15 to create this special birthday card for my daughter. Also, going to add this card to Simon Says Stamp Wednesday Challenge of "Anything Goes" 

Here, I kept the card fairly smiple and stamped this adorable little girl and bird from the Wine Not set and colored using my copic markers. Than I thought it would be nice to add a sky, so I pulled out the large scallop from the Stitched Border 2 from Pretty Pink Posh to use as a template and did some ink blending.

This set has so many wonderful sentiments relating to wine, so I added it onto the Stitched little cirlce using some black ink.  

From there, I cut a strip of purple designer paper to add behind the focal point along with a stitched scallop border from the Stitched Borders 3 die collection. To add some dimension, I added some white fun foam under the base panel. This also allows the scallop border to show off as it's white against white.   

Next, I decided to add just a little more dimension and also added some white fun foam under the focal point to pop up the scene. Finished off the card by adding several 4mm Sparkling Clear Sequins to add some sparkles. 

Saturday, October 1, 2016

Mini Envelopes for Any Occasions!

I'm excited today to share how I created these mini envelopes using some Pretty Pink Posh dies, stamps, and sequins. It’s quite simple and easy to create these for a gift card, money, and or add a simple note inside for any occasion. 

Let's get started as there are several photos to help assist seeing how this came together. Grab some coffee or tea and enjoy!
  
With just a few steps, you can create several mini envelopes ahead of time to have ready for any occasion

First Step: Cut a piece of white card stock measuring 4" x 5 1/2"  

Step Two: Score the card stock at 3/8" and 3" mark

Step Three: Turn the cardstock piece and place the border die on top to run through the die cut machine. Here, I used the Stitched Borders 2 and for the second card I used the new Scallops Borders die.

After die cutting the borders, I used a bone folder to ensure the score lines were pressed down firmly.

Step Four: Here, I used the Stitched Duo 2  to die cut a stitched rectangle using white card stock. Next, I took the Pocket Border die and placed on top of the rectangle to create the inside of the mini envelope. 

Step Five: When creating projects, I prefer to use a stronger adhesive, here I used 1/4" Scor Tape and added to the bottom of the 3/8” score line and on the sides of the second piece which goes on the inside.  

Here you can see a mini envelope was created with just a few steps. At this point, you can leave as is, but I decided to decorate it. 


To decorate: I took some designer paper measuring 2 1/2" x 4 1/2"  and used the same scallop borders as the mini envelope. As I wanted some wiggle room to match up the scallops, I cut the designer paper a little wider than the envelope itself.  

After die cutting the borders from the designer paper, I lined up the paper to the front flap of the card and than turned the mini envelope over to draw a line where I needed to trim the paper.

For this one, I used the Blissful Butterflies stamp set along with the Blissful Butterflies Coordinating die to help me cut one (1) of the butterflies for the center. Next, I took these adorable flower sequins from the new Tropical Flower Sequins Mix to add on top. 

For this card, I used the new Fox Friends set along with the Fox Friends Coordinating dies to once again assist me in cutting. Also, since I wanted a border behind the fox, I cut a strip of Kraft card stock and used the Stitched Borders 2  (straight border) to create the stitches. 

Final touch was to add these adorable flowers from the new Tropical Flower Sequins Mix    

Here are some ideas of what you could put inside - A gift card or money  


Another idea would be to create a simple note card to add inside as a thank-you, just because, and/or to cheer someone up.  


Since I wanted the note card to match the envelope, I took an image from each set and stamped directly onto the card stock. Measurements for the note cards: 3 3/8" x 2 1/2" and than used a corner punch to round them.

To close these mini envelopes, I used a small glue dot and placed on the inside of the flap. This way, the envelope remains sealed until opened for a surprise.

Hope you enjoyed and thanks for hanging in with me today!  Also, I'm entering these mini envelopes for the Simon Says Stamp Wednesday Challenge of "Anything Goes"

SUPPLIES: