Thursday, March 2, 2017

It's Your Birthday!

Having fun with the new Pretty Pink Posh release to create another Happy Birthday card using this cute Friends Forever set along with the Coordinating Die Also, joining in for Kathy's 30 day color challenge over at the The Daily Marker with coloring all these heart balloons and adorale little kids using my copic markers.

For the base of the card, I used the new Stitched Notes Die and love the size to create a panel background. Here, I used some designer paper along with light blue cardstock for the bottom. Also, love the three little banner dies in varies sizes to choose from. 

For these clouds, I pulled out the Rainy Days set as I love how you can add faces and make them happy. 

For the sentiment, I'm using another new set called Everyday Greetings where I embossed it using versamark ink and white embossing powder. 

To finish off the card, I added a couple Spring Flower Mix along with some 4mm Sparkling clear sequins.


SUPPLIES:

Monday, February 20, 2017

Happy Birthday with a Shakercard

We all love sales and today, Pretty Pink Posh is having a 15% off sale valid Monday February 20, 2017 valid with code. Check out her blog for more details.

Wanted to create a Happy Birthday shaker card for one of my IG friends to wish her a belated birthday and since I wanted to create one using a tag, I thought what better way, but to pull out this adorable Stitched Duo 1 die from Pretty Pink Posh as it also has these little stitched squares to add in little sayings along with sequins.

Before I started to piece this shaker together, I wanted to add some sentiments from the Birdie Friends set as I find the words perfect for any occasion, so I took this phrase out and put the words "hugs" above and "to you" at the bottom.

Than I thought it would be fun to add in some birthday balloons, so I pulled out the ornament from the Winter Friends set and did some alterations along with using my copic markers to color them in. Also, a good way to stretch your stamps. 

Here, you can see, by cutting off the hook, I was able to get two different looks for the actual balloon and then added a balloon string to each one. To give them dimension on the card, I added some foam mount tape underneath each one. 

Next, was the fun part of adding in these iridescent 4mm Lavender Moon sequins which I love the way they sparkle. In addition, depending on how the light hits, it creates different hues of colors, so I wanted to make sure to use them for this special birthday card. 

For the center focal point, I wanted to use this cute little bird from the Birdie Notes set as she has a wonderful smile and cheerfulness that would make anyone smile. Next, I used the Zig Clean Color Real Brush markers to color it. 

Last but not least, I can't resist but to use this adorable little bow from the Holiday Pals set as I find it's the perfect little hair accessory. 

Don't forget to check out the 15% sale Pretty Pink Posh is having today as it's valid for today Monday 2/20/2017 only.

Monday, February 6, 2017

Pretty Pink Posh Annoucment and Design Team

Today, Pretty Pink Posh is announcing the PPP Design Team members for the next term and I must say I'm beyond excited and feel truly blessed to be able to work with Paulina and her amazing talented team since she is not only kind hearted and generous, but a fabulous amazing and wonderful person to work with. 

Today I had some fun creating this Happy Birthday card for one of my sweet friends overseas and have several more ideas for the upcoming days.

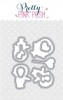
I just love this cute little penguin from the Winter Wonderland set of Pretty Pink Posh along with little girl all snuggled up in her outfit. Plus, the polar bear is darling, so I combined all of the images from the set on this card. 

For this scene, I also added a couple of trees which comes from the Winter Friends set and colored them using: YG03, YG17, YG68. 

For the Penguin, I used C3, C5, C7, YR68, R20 for cheeks. 
Sleigh and little girl outfit: R32, R35, R46

The background, I took some water color paper from Tim Holtz and used some distress inks: Peacock Feathers, Salty Ocean, and Tumbled Glass. 

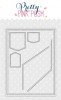
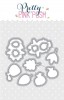
Since I wanted some snow, I used my my favorite Scallop Borders to create the snowy hills by die cutting two and overlapping them together.

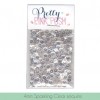
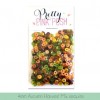
This card is easy and fast to make. Also added some 4mm clear droplets to resemble water effect to finish off this card.  

With the reopening of the shop and the new announcement of design team members, Paulina is having a giveaway that you can check out Here on her blog!

Friday, December 9, 2016

Season's Greeting with a Star

For today, I decided to do a quick and easy Christmas card using this gorgeous Stitched Stars die from Pretty Pink Posh as I love the size and rounded edges. Not to mention, love the stitching, both inside and out.

To create this, I frist cut out a square base measuring 4 1/4" x 4 1/4" and added some Red cardstock as my base and found this cute paper in my stash from Martha Stewart so I added it as well. I'll update the post with the name later on today. 

For the Star, I created a quick shaker using some silver glitter card stock along with some fun foam for the center. (Layer inbetween the shaker).....you can also use foam mount tape, but it's easy to die cut the star using fun foam and use that for the dimension. 

Before putting the star shaker together, I stamped the sentiment from the Christmas Friends in the center and added several 4mm Holly Jolly Christmas Sequins mix.    

Finished off the card by adding some Twine and Bow using some red card stock and again in white card stock to add a shadow effect. In the end, this card measures 4 1/4" x 4 1/4". Super easy and fast to make. Hope you enjoy!


Thursday, December 8, 2016

Merry Christmas

Back today with another Christmas card as we are getting closer to Christmas Day and plan on sharing more ideas on the days ahead. Also, joining in over at Simon Says Stamp Wenesday challenge of using Ice Inspiration

I had lots of fun coloring this cute little bear and Santa hat from the Winter Friends set from Pretty Pink Posh and adore all of the images in it. Also, I couldn't resist but to use this Poinsetta's, Pine, and Mistletoe again from the Mistletoe & Holly set from Essentials by Ellen to create this Christmas card. 

For this card, I'm using one of my favorites, the Falling Snow Stencil from Simon Says Stamp as my Ice Inspiration along with some texture embossing paste. Love the snow effect on Christmas cards.

Super easy to create several of these in one sitting. For the sentiment, I used the Merry and Bright designer dies from Essentials by Ellen and layered three of them together to create some dimension. 

To finish off this card, I used several 4mm and 6mm Gold Metallic sequins from Pretty Pink Posh as I love to add sparkles.  


Thursday, November 24, 2016

Happy Thanksgiving to All

Wanted to wish everyone a Happy Thanksgiving and hope you have a wonderful day with your family! Also, I wanted to say how grateful I am to have amazing friends and support and hope everyone is safe and healthy. 

Here is one more card using this adorable Giving Thanks set from Pretty Pink Posh and joining in on another day of the color challenge over at the The Daily Marker  

I always have fun with these Storybooks, this one is Storybook 3 and this card came together easy and fast. Also, I decided to change things up a little and actually emboss on top of the acetate using gold embossing powder and love how it worked.

As I mentioned before, I do love seed beads so the new Autumn Seed Bead Bundle came in super handy as I mixed these two colors together. At first, I was thinking of only green as to resemble grass, but when this sand color got mixed in, I couldn't resist but to add more.

Before adding the seed beads, I glued some 4mm Autumn Harvest sequins mix along with some foam mount tape under this cute little beaver girl as to add just a little more dimension. All images were cut using the Coordinating die.

Last but not least, added the leaves and pumpkins which where colored using my copic markers. The two pumpkins on each side of the little girl were also popped up using some foam mount tape. 

This is a second post for today, so in case you are looking for the Christmas Tag post, click here to go directly there. Again, wishing all of you a Happy Thanksgiving with your families!


SUPPLIES: