Friday, November 11, 2016

Christmas Time Again

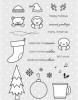
Back today with another Christmas card using this adorable new Winter Wonderland set from Pretty Pink Posh and love all of the fun images with cute sentiments. Also, joining in for another day of the color challenge, day 11 over at the The Daily Marker

Again, these storybook dies are so much fun to play with and decided to use this Storybook 5 once more to create another Christmas card by changing color combo along with some other items. 

Here, I started this card again using the Falling Snow Stencil from Simon Says Stamp along with some texture paste and once again used these Scallop Border dies to create some snow hills. 

Since this set has wonderful snowflake images, I decided to heat emboss a few of them using some silver embossing powder to add for the sky scene and love the various sizes to choose from. 

Next, I colored these cute images using my Copic markers and used the Coordinating die to help me cut them along with the snow images. 

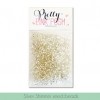
From there, I glued down several 4mm Holly Jolly Christmas Sequins mix as I love this combination of reds, blues, greens, and white and proceeded to fill the upper frame with Silver Shimmer Seed Beads .

Than, I decided to add more 4mm Holly Jolly Christmas Sequins to fill up the bottom portion of this die and create a dual shaker look of side by side using the different elements. 

SUPPLIES:

Tuesday, November 8, 2016

Sneak Peek - Thanksgiving Theme Week

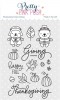
I've been enjoying playing with this Giving Thanks set and wanted to share a sneak peek at my card today which is up on the Pretty Pink Posh blog as they are hosting Thanksgiving theme with lots more inspiration coming throughout.  

More details on this card at Pretty Pink Posh blog today and hope you enjoy!  


Monday, November 7, 2016

Christmas Card using Winter Bird Friend

Back today with another Christmas card using this adorable limited edition sets from Simon Says Stamp that was designed by Pretty Pink Posh as a collaboration during the Stamptember event. 

This set has so many fun accessories and its always fun to play dress up....don't you think? Also, joining in for another day of the color challenge, day 7 over at the The Daily Marker 

These storybook dies are so much fun to play with and love last month's addition of of Storybook 5, with the larger frame and side by side smaller rectangle. Here, I decided to use the bigger frame on top, but it can be used in a variety of ways. 

For this card, I started off by adding some snow using the Falling Snow Stencil from Simon Says Stamp along with some texture paste. 
   
To create the snow hills, I pulled out these Scallop Borders die from Pretty Pink Posh where I die cut two (2) of them to overlap and added them to the frame before placing down onto the Kraft card stock.  Can you tell it's one of my favorite dies? 

Next, I colored in these cute trees from the Winter Friends set using my Copic markers: 
Green: YG03, YG17, YG67
Brown: E37 and E33 

Also, to help cut them out and save time, I used the Coordinating die from the Winter Friends. From there, I added in several 4mm Holly Jolly Christmas Sequins mix as the colors go so nicely against the Kraft and perfect for this occasion. 

If you notice, I also added some 4mm Sparkling Clear sequins and glued them directly onto the tree as ornaments. From there, I took one of the many sentiments from the set and heat embossed using Ranger's Super fine white embossing powder. Love the fonts and sentiments from this set.  

These winter hats and scarf's are so cute, so once again I colored them using my Copic Markers using a red combination of R35, R46, R59 and glued them in place. Also, I added one of the four pairs of booties. Added some foam mount tape underneath before adding to this card to give it a little more dimension.


Sunday, November 6, 2016

Giving Thanks with Lots of Sparkles

Here is another card using this adorable Giving Thanks set from Pretty Pink Posh and decided to create a thank-you card using non fall colors and do some water coloring for the background to join another day of the color challenge over at the The Daily Marker  

Started off by creating this background by using some water color paper and two Tombow Dual Brush markers with a blue and green. Added strips of color by alternating the two and added some water to blend the colors together.

When it was all dry, I took several leaf images from this set, big and small, and randomly added to the background using VersaMark ink along with some white embossing powder. I love the contrast of these white leaves against the colored background.

Moving onto the shaker portion, I used a 2 5/8" circle die and placed on the upper portion of the card and ran it through the die cutting machine. From there, I die cut the smaller Scallop Circle from Pretty Pink Posh to add over the opening to add a decorate look. 
   
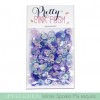
For the inside of the shaker, I added some pink clouds by doing some ink blending using Spun Sugar distress ink and added some Silver Mini Stars Confetti which I glued down in place before adding this amazing new Winter Sparkle sequin mix which has an array of purple shades and iridescent sequins as well. Love it!  

Finally, added this adorable little beaver from the Giving Thanks set using some foam mount tape to finish off this "Thank-you" card. Also, used the Coordinating Die to help me cut out this cute little beaver.   

SUPPLIES:


Saturday, November 5, 2016

Sending Holiday Cheer with Holiday Pals

Getting a start on Christmas cards, so today I wanted to share how this card came together using several Pretty Pink Posh dies, stamps, and sequins to create this shaker card. 

Let me say that when I first started off with this card, it wasn't going to be a Christmas card, but as I was experimenting with some dies, next thing you know, it's Christmas. Also, joining in with the color challenge Kathy is hosting at www.thedailymarker.com with this cute little penguin.

For this card, I started by creating a wreath using the Holiday Pals set and stamped out eight (8) leaves and used the Coordinating dies  to help me cut them. Next, I die cut a circle using the Stitched Circles from Simon Says Stamp along with a darker green cardstock to give it some contrast.

From there, I used the circle as my guide to add the leaves around, but since I wanted to add something more, I pulled out these cute little berries from the Winter Friends set and added them on top. 

Next, I moved onto the shaker element and pulled out one of my favorites, the Stitched Banner Duo and added the sentiment in the center, again using the Winter Friends set and colored in this adorable little penguin using my copic markers. 

When looking at all of the different sequins, I thought this 6mm Holly Jolly Christmas sequins mix would be perfect to use for this card. 

After I was done with the shaker element, I was looking around my craft table when I saw this Mini Tag die in red, so in playing, I added two of them behind the shaker where it gave the illusion of one long banner behind. 

Next, I wanted a bow on top of the wreath, so I pulled out the Twine and Bow die along with using some Silver Foil card stock as to not add any bulk to the wreath. 

For the background, I thought it would look nice to add in some snow effect, so I used the Falling Snow stencil by Simon Says Stamp along with some texture paste by Ranger. 

SUPPLIES: 


Wednesday, November 2, 2016

The Daily Marker 30 Day Color Challenge Blog Hop

 
Hello! Welcome to Day 2 of The Daily Marker 30 Day Coloring Challenge. Today is the FIRST day of a THREE DAY blog hop to jumpstart your creativity. If you’re new to the coloring challenge or have any questions about the coloring challenge you can refer to this post : http://www.thedailymarker.com/2016/10/coloring-challenge-bring-it-on/

If you are coming from the talented Jenny Lee Yamasaki blog you are in the right place, but if you get lost, no worries, a complete line up is below to stay on track during the blog hop. 

As November has started, I decided to play with this cute Giving Thanks set from Pretty Pink Posh as it has variety of fall images and sentiments that are fun to play with. Also, used the Coordinating Die to help me cut out all of the images. 

All of the images were colored using my Copic markers and truly enjoyed trying out some color combos and practicing coloring.   

For the card itself, I started off with some Fall Perfectly Plaid paper from Lawn Fawn and proceeded to create a shaker card using one of my favorite dies from Pretty Pink Posh which is: Storybook 4 as it's perfect to create different scenes and/or add different shaker elements.   

For the inside, I first created some clouds/sky and added some new 1/4" Gold Star Confetti which I glued down in place before adding some Autumn Seed Beads which are fun to shake. 

For the sentiment in the middle, I ended up heat embossing using some white powder from Ranger (Super Fine) and added these cute little critters all dressed up using some foam mount tape to add just a little more dimension.

Looking forward to more coloring with The Daily Marker 30 Day Color Challenge as it's always fun each time Kathy hosts this and I appreciate all the hard work she does each time.   

Now it’s time to hop to my friend ..... the talented Julia Altermann

GIVEAWAY : 12 GOODIE BAGS ! That’s TWELVE CHANCES TO WIN during the three day hop. The more you comment on each hoppers blog or instagram the more chances you have of winning. Winners will be chosen randomly FROM THE BLOGS and INSTAGRAM hop comments. The full list of winners will be announced Wed. Nov 14th 9 am. at www.thedailymarker.com (contest closes 11.13.16 at 11pm. EST)

Here is the complete list of Blog Hop Participants:


Thank you for your visit today and I hope to see you during the coloring challenge. Be sure to use the hashtag #thedailymarker30day so we can find your work or you can join the Facebook group here.