Thursday, September 29, 2016

Saying Hello using Blissful Butterflies!

I'm back again today with this Hello card and challenging myself to go out of my comfort zone where I played with ink sprays and than ended up with this card 
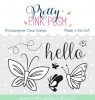
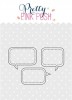
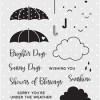
using these beautiful butterflies from Pretty Pink Posh called: Blissful Butterflies.  

Also, entering this card for the Simon Says Stamp Wednesday Challenge of "Anything Goes"

First off, let me say that I'm loving these butterflies and sentiment "Hello" as it can become any card depending on what is written inside. A Happy Birthday, Just Because, etc. 

Here is my card:
First off, I took a piece of watercolor paper 
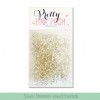
measuring 4 1/4" x 5 1/2" and sprayed several colors of ink using Art Anthology with the following colors: Barbie, Granny Smith, Glorious, Siesta Key, and finished off with Gilded Gold.

I'm assuming you can get similar results with distress sprays, but since I had these, I wanted to give it a try. Moving 
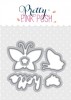
forward, I took the Blissful Butterflies Coordinating Die and placed them on top of the water color panel where I wanted the butterflies.

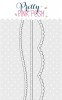
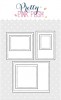
Next, I used the curved scallop die from the new Scallop Borders set and ran the panel through the die cutting machine. Than it occurred to me that I wanted a little white showing, so I ran the border die again and adhered it to the panel. 

Next, I took the base card and added a strip of chocolate card stock to the right side but left a little white showing. Next, I die cut three (3) butterflies using watercolor card stock as my plan was to do some water coloring.  

To align the butterflies, I placed the panel on top of the card and popped in the butterflies. Once the butterflies where in place, I realized the card looked nice without coloring them. You could stamp the butterflies directly onto the cardstock.

Next, I added some white fun foam to the back of the panel using temporary adhesive. From there, I flipped the card around and placed the Blissful Butterflies Coordinating Die back into place to run through the die cutting machine to cut through the white fun foam.   

Now keep in mind, when I was creating this card, I was thinking of a shaker card and experimenting.
From there, I removed the white fun foam to add some acetate and than aligned the white fun foam back into place to glue down.

Since I was using watercolor card stock, I decided to use a stronger adhesive tape to ensure the panel stays in place, so I pulled out and added 1/4" Scor-tape before closing off this card. 

You could skip the acetate altogether, but for this card, I added it since I was planning on shaking things up a bit.

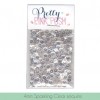
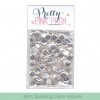
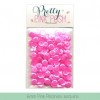
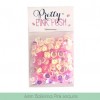
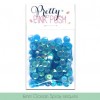
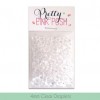
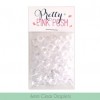
To give this card some sparkles, I used a combination of both 4mm and 6mm Sparkling clear sequins to add on top of the card along with adding the sentiment "Hello" where the coordinating die was so helpful and took only seconds to cut. 

SUPPLIES:  

Tuesday, September 27, 2016

Sending Warm Birthday Wishes!


I'm back today with another birthday card and once again having fun with distress inks. Also, joining in over at Seize The Birthday with this week's challenge topping of Soft and Simple and Simon Says Stamp Monday Challenge of: Use Embossing Powder or Pigment Powder 

 Here is my card:
This card is for Kathy over at The Daily Marker and since she loves flowers, I thought to practice doing some watercoloring again using this Beautiful Bouquet: Ranunculus from WPlus9 Design Studio along with using distress inks.

To start this card, I stamped the image using some versamark ink and than heat embossed using some white embossing powder from Ranger along with some water color paper.

Next, I took several distress ink colors and put them onto a palette to use.

For the leaves: Mowed Lawn and Peackcock Feathers
Litte Flowers: Mustard Seed, Walnut 
Large Flower: Festive Berries, Spun Sugar
Berries: Seedless Preserve
Background: Tumbled Glass

Added a sentiment at the bottom using the Winter Pals set and to add some sparkles, I added several 4mm clear droplets from Pretty Pink Posh.as it reminds me of water drops.


Saturday, September 24, 2016

STAMPtember Simon Says Stamp + Pretty Pink Posh - Winter Bird Friend

As you know, Simon Says Stamp is celebrating STAMPtember all month long and I'm so excited today to share this exclusive limited edition stamp set designed by Pretty Pink Posh for Simon Says Stamp called: Winter Bird Friend as it's so adorable and fell in love with it. 
This set has so many fun accessories and I was having so much fun dressing them up with these adorable scarf's, hats, and booties which is how this Happy Holidays shaker card came together. 

For this card, I started off by adding some snow using the Falling Snow stencil from Simon Says Stamp along with some texture paste.  

Next, I created these snow hills by using the new Scallop Borders die from Pretty Pink Posh where I die cut three (3) of them to place on top of one another to form the hill.  Love the details of the stitching and curves.

These winter hats and scarf's are so cute, so I pulled out my copic markers to color them using a red combination of R35, R46, R59 and glued them in place. Also, I added one of the four pairs of booties as they are so adorable along with some silver glitter on the hats.

To add a sentiment, I thought this Stitched Speech Bubbles die from Pretty Pink Posh would be perfect to add in and make it appear as they are speaking.

From there, I glued some 4mm Sparkling clear sequins to add more details to the background and added several Silver Shimmer Beads for the shaker portion as I love the way they shake inside. 

To close off the shaker card, I pulled out these beautiful exclusive Scallop Frames, also from Pretty Pink Posh as I love the inverted scallops and find it perfect to frame around any scene.  

There are loads of inspiration over at the Simon Says Stamp Blog to see more of this exclusive limited time stamp set. So make sure to check it out.


SUPPLIES:


Thursday, September 22, 2016

Mini Shakers - Get Well Cards

Many of my friends have not been doing well, so I thought I would create some quick mini shaker cards using the Stitched Photo Frames from Pretty Pink Posh to send out to them as to cheer them up.  

To start this mini card, I pulled out some white card stock and cut a 5" x 7" piece which I folded in half. This way, the finished card size is 3.5" x 5". 

Here is my card: 
From there, I cut a piece of white card stock measuring 3 1/4" x 4.75" and added some designer paper using the 6x6 inch Perfectly Plaid from Lawn Fawn as my background. To give it some dimension, I added some white fun foam underneath the panel. 

I do love these Stitched Photo Frames and thought it would be perfect to use for these mini shaker cards as it's easy to make several of them. 

If you’re wondering what paper I used for the top of the photo frame, it's called Beachside from Lawn Fawn. 

Now for this shaker, I thought it would be nice to have the sentiment on the inside of the shaker, so I pulled out the Rainy Days stamp set from Pretty Pink Posh as it has some of the best sayings for cheering up someone. 

Next, I added some 6mm iridescent sequins using the following colors: Balleria Pink and 
Ocean Spray, but since I wanted some pink as well, I added some 6mm Pink Peonies and love the combination of the sparkles together. What do you think?

I realized I had this little raccoon colored already from the Three Amigos set of Mama Elephant already done, so I thought it would be great to add and use one more sentiment from the Rainy Days set to say "Get Well Soon".


SUPPLIES:


Saturday, September 17, 2016

Saying Hello with some Butterflies

I'm back today but with some watercoloring and playing around with some distress inks to join in the bi-weekly challenge #103 Watercolor over at Marker Pop. When I saw the challenge, I thought it would be a perfect time to play with my Spectrum Aqua Markers, Distress inks, and play with these beautiful butterflies from Pretty Pink Posh.  

Here is my card: 
For this card, I started off by stamping these cute butterflies and sentiment from the Blissful Butterflies set onto a piece of watercolor card stock, measuring 4 1/4" x 5 1/2". From there, I pulled out my Spectrum Aqua markers to color them in using the following colors: Marigold, Gold, and Yellow for the wings and Chestnut and Desert for the body.

Next, I stamped the butterflies and word onto some masking paper and used the Blissful Butterflies Coordinating die to cut it out to place on top of the butterflies and word to protect them while I created the background.

To create this background, I used a stencil and added Picked Raspberry distress ink onto the stencil and spritzed it with water that was mixed with Perfect Pearls. From there, I layed down the stencil onto the water color paper. I repeated this again with Peacock Feathers and Scattered Straw distress ink. I will say this was fun to make.
Picture of stencil and how I added the ink 
From there, I cut off 1/2" from the panel and added some white fun foam underneath to add some dimension. Before placing down, I added a border to the left side using these Scallop Borders die from Pretty Pink Posh

To finish off this card, I added some clear drops in both sizes, small and large to give the illusion of water drops. 

SUPPLIES: