Sunday, December 24, 2017

Christmas Friends with Snowflakes

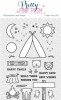
I'm back today with a quick and easy Christmas card using this cute adorable little girl, snuggled in her coat, and drinking some coffee using the Christmas Friends set from Pretty Pink Posh.

Started off by cutting a white panel measuring 4" x 5 1/4" since I wanted a white border from the base as well as adding some white fun foam underneath to give it some dimension.

From there, I added some designer paper using the Perfectly Plaid paper from Lawn Fawn measuring 4" x 3 
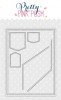
1/2" in height.  Next, I pulled out the Stitched Border 3 and die cut two borders, one with the scallops using white card stock and other one using blue card stock and pieced it all together onto the panel. 

Love these gorgeous snowflakes from the Winter Wonderland set and thought it would be perfect to emboss them using some silver embossing powder to add some sparkles to this Christmas card as well as adding some 4mm Sparkling clear sequins.
I will say, I love the Coordinating die to help me cut these snowflakes out as it was a life saver. 

To finish off this card, I stamped the sentiment on the upper right hand side and colored 
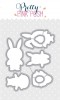
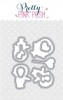
this adorable little girl from the Christmas Friends set using my copic markers along with using the Coordinating die to help me cut fast and easy. 

SUPPLIES:

Saturday, December 9, 2017

Thank-you with Flowers using Wild Rose

I wanted to create some Thank-you cards and thought what better way, but to also add some flowers and create a shaker card. This also gave me a chance to use the new Wild Rose stamp set along with the Thank-you Script die from Pretty Pink Posh and will say.......I love using them both. 

Instead of coloring them with my Copic markers, I decided to emboss the images using white powder from Ranger and use inks to color them in. 

For this card, I used some of my favorite ink colors from Simon Says Stamp and Altenew. To apply the ink onto the paper, I used ranger's foam blending tool. 

For the leaves, I used Jellybean and Green Leaf 
Flowers: Hot Mama, Maliblue, Audrey Blue 
Flowers: Mango ink from Altenew

For the yellow flower I wanted to add some contrast so I grabbed a couple of Copic markers: Y15 and Y17 and blended it in.

Next, I pulled out the Scallop Frames from Pretty Pink Posh and used the smaller die along with some black card stock. Since I wanted a little scene in the background, I added some clouds using Sea Glass ink.

Than came the fun part of adding in sequins and went a little crazy with the Sparkling Clear Confetti Mix and Gold Mini Stars but loved the combination.

To match the gold Mini Stars sequins, I used Gold foil card stock for the Thank-you script. 

SUPPLIES:

Sunday, November 19, 2017

Happy Holidays with Furry Foxes

Here is another Christmas card using the new Winter Woodland from Pretty Pink Posh. Also joining the fun over at Simon Says Stamp Wednesday Challenge with Furry Friends theme week.

I'm loving this set with all of the cute little animals so I got out my copic markers and started coloring again along with using the Coordinating die to help me cut them.

For this card, I used some distress ink to create my background. Starting from the bottom up, here are the colors: Peacock Feathers, Salty Ocean, and Tumbled Glass.

Next, I pulled out the Winter Wonderland set to use these pretty snowflakes and heat embossed using white powder.  

These cute Stitched Photo Frames were perfect to create little shakers which gave me a chance to use the new Starry Night sequins mix which is filled with several sizes and colors along with little mini silver stars, and more. This mix is so pretty in person. 

For the sentiment, I pulled out the Happy Snowman and stamped both sayings inside each photo frame.   

SUPPLIES:

Thursday, November 16, 2017

Winter Christmas with Furry Friends

Back today with another Christmas card using the new Winter Woodland and more from Pretty Pink Posh. Also joining the fun over at Simon Says Stamp Wednesday Challenge with Furry Friends theme week along with joining the challenge with the IG Crafty Crew with Let it Snow. 

This set is so cute with these little foxes, birds, and more so I got out my copic markers and started coloring. Than used the Coordinating die to help me cut them out.

For the base, I used the Falling Snow Stencil again from Simon Says Stamp along with some texture paste. Also, once again used the Scallop Border dies to create the snow hills and overlap them together to give the illusion of snow.  

Next, I grabbed this new and fun Merry Christmas Script die and ran it through the die cutting machine twice and glued together. From there, I used the same marker colors from the bird and colored the Script to match.  Colors: B21, B23, B24

To add some sparkles to the background, I grabbed some new Sparkling Clear Snowflakes and glued them down in place. Love the size and sparkles.

For the trees, I pulled out the Holiday Pals and used: YG03, YG17, YG67 along with the Coordinating die to help me cut them out. 

SUPPLIES:

Monday, November 13, 2017

Joy Shaker for Christmas

Back today with another Christmas card using the new Joy Shaker die from Pretty Pink PoshAlso joining the fun over at Simon Says Stamp Wednesday Challenge with Snow White theme week. So I added lots of snow elements to this card. 

On my previous card, I ended up die cutting several colors along with gold foil using the Joy Shaker die and cut the word "JOY" so I decided to use the word on this card as it fit perfect. 

Since I love using the storybook dies to create shaker cards, I pulled out this Storybook 5 to get started.

To start, I pulled out the Falling Snow Stencil from Simon Says Stamp along with some texture paste and than moved on to create some snow hills by using the Scallop Border dies and overlap them together to give the illusion of snow.  

Next, I added several new Sparkling Clear Snowflakes and glued them down in place for the top half of the card. For the bottom portion, I added some new Evergreen Sparkle Mix. This is such a pretty combination mix of green, gold, and marshmellow.  

Next, I colored this cute little penguin and sleigh from the Winter Wonderland set using my Copic markers along with using the Coordinating die to help me cut them out. 

Last but not least, I used the new Holiday Greetings stamp set for the "Wishing You" and heat embossed using white against red cardstock. Still playing with the entire new collection of dies, stamps, and sequins and having fun. More to come.  

SUPPLIES:

Tuesday, November 7, 2017

Christmas Shaker using Pretty Pink Posh

So excited to play with Pretty Pink Posh newest release of dies, stamps, and sequins as everything is so amazing and wonderful that I ended up creating this Christmas shaker card using the new Joy Shaker die.

For this card, I ran the die 3 times through the die cutting machine. Once using red card stock, a second time using white, and a third time using gold foil. It cut beautiful each time. 


Shakers can be created using different methods. Some use foam mount tape, some may use several layers of card stock, and some may use white fun foam and/or colored fun foam. 

For this card, I decided to use some white fun foam for the center. Again, the die cuts beautiful through it. For the base of my shaker, I cut a circle slightly smaller than the actual die itself and lightly added some blue clouds. 

I originally started with red card stock for the top of the shaker, but thought to create a shadow effect with the words, so I cut the word out and layered on top using white. 

Next, I added this lovely new Vintage Christmas Sequins Mix and was able to spread throughout using the word to help surround them. 

For the sentiment, I used the new Holiday Greetings stamp set and heat embossed using white. Let me say, I'm in love with the entire new collection of dies, stamps, and sequins.  

Make sure to visit Pretty Pink Posh's newest release as everything is so amazing and adorable.

SUPPLIES:

Sunday, November 5, 2017

Warm Wishes Christmas Tag

Back today with a Christmas tag to join in the fun over at Simon Says Stamp Wednesday Challenge with Christmas Gift Tag theme week. I do love this Christmas Friends set from Pretty Pink Posh as it has such adorable little kids and plus I love her cozy little jacket.  

For this tag, I pulled out this Stitched Duo 3 and die cut it without the windows. Love how versatile this die is and used many times. Here, I did some ink blending and used some distress inks to create this tag. The colors used are: Peacock Feathers, Salty Ocean, and Tumbled Glass.  

Colored this cute little girl snuggled in her outfit using my copic markers and added glitter for some sparkles. Don’t you love her little outfit?


For these gorgeous snowflakes, I used the Winter Wonderland stamp set, also from Pretty Pink Posh and embossed them using silver embossing powder along with the Coordinating die to help me cut them fast. 

For the sentiment, I grabbed the new Holiday Greetings stamp set along with using some Holiday Shimmer sequins.    

If you are wondering what sequins is laying around the tag, it's the Sparkling Clear Confetti Mix which is a new favorite of mine.

SUPPLIES:

Wednesday, October 25, 2017

Sending Thank-you with Flowers

I’m having lots of fun playing with colors, stamps, dies, and sequins and wanted to share another card I created using these amazing products from Pretty Pink Posh  Also, joining in the challenge with Simon Says Stamp Wednesday Challenge with Anything Goes theme week.

This Bold Blooms set is fantastic and so much fun to play with. I kept stamping several flowers using different colors. Plus, the Coordinating Die comes in so handy when you want to add one more leaf and/or one more flower. 

Once again, I'm using these awesome Scallop Hexagon Dies to create the shaker portion of the card. Since the Stitched Hexagon Dies fit perfectly with these dies and look awesome combined, I used them both. 

Therefore, I started out by using the largest size from the set along with blue card stock to use as my base. 

From there, I worked on the shaker portion of the card by using the mid-size dies from both, Stitched and Scallop Hexagon dies.

I love all of the latest new sequin colors so I combined 4mm NavyMini Sparkling Clear flowers and 4mm Champagne.  

Once I saw this Thoughtful Greetings set, I fell in love since it has fabulous sentiment sayings along with the combination of large and small fonts. Therefore, I decided to split one of the sayings to use a portion inside the shaker and the other portion on the bottom of the card with white embossing powder. 

To add a decorated border, I used one of the new Scallop Borders 2 dies and laid it down as a slanted curve before die cutting.

At the end, I added some foam mount under the little flowers and leaves to pop them up.    

SUPPLIES:

Monday, October 23, 2017

Friends with Woodland Critters

I'm so happy to be able to craft again after undergoing medical issues that prevented me from doing what I love. All I can say is that I'm grateful as life can be such a daily challenge, but I wanted to share what I did with these amazing Pretty Pink Posh products and sequins.
This Woodland Critters set is so darn cute with so many adorable animals and sentiments that I couldn't resist but to make this fun upright card. Love the size of this amazing bear where you feel like hugging him, at least for me, and so easy to cut out using the Coordinating die as it's a perfect match. 

Once again, I'm absolutely in love with these new Scallop Hexagon Dies as I enjoy the scallops inverted as it adds a nice touch to the frame. Plus, the dies nicely cut through cardstock and fun foam to create this heaxgon shaker card. I enjoy creating an upright card so the recipent can place it anywhere to view. Here, I'm using the largest size from the set.

For this card, I originally started out by die cutting the card using the Stitched Hexagon Dies and than added the scallop frame on top to add more details, plus it's cute. They are a perfect fit together.
After adding some clouds and grass to the scene, I used one of the sentiments from the set as I adore the font combination of large and small. Don't you? Next, I couldn't resist but to use some new sequin colors so I combined 4mm Navy and Mini Sparkling Clear flowers which is one of my new favorites.

I decorated the inside of the card using a sentiment and the banner from the
Birdie Friends set as well as cutting off the legs of the banner to just have the saying outlined. Than I added some foam mount to pop it up which helps to hold the card upright so one can place anywhere.  

Monday, March 13, 2017

Easter is Coming!

Previously, I colored several images from the new Pretty Pink Posh release using my copic markers and before you know it, another fun shaker card was done.

This Easter Friends set is so much fun with the adorable little kids all dressed up that I got into the Easter mode. Love how this little guy is all dressed up in his cute bunny costume and to cut out everything perfectly, I used the Coordinating die as it's a perfect match. 

In playing around, I thought to use the new Scallop Square Tags as I'm loving the shape, size, and amazing detailed stitching. Here, I'm using the bigger square tag. 

Since, I wanted to make this into a card, I pulled out my polka dot stencil to use for a background along with a light shade of blue from Simon Says Stamp called Surf Blue. Than, I added it to my pink base card stock. 
 
I must say, the new Friendship sequin mix is absolutely gorgeous in person with the different shades of pinks, not to mention, they are iridescent and sparkle like no other. Plus, it contains two different sizes, both 4mm and 6mm. 

To add a little bow on top of this shaker, I thought what better way but to use the Twine and Bow die from Pretty Pink Posh as it's perfect finishing touch. Added a little flower in the center of the bow using the Spring Flower Mix  


Thursday, March 9, 2017

Pretty Pink Posh New Release Blog Hop

Welcome to Day 1 of the blog hop showcasing Pretty Pink Posh's new release with tons of fun and inspiration. Plus prizes to be won. More information at the bottom. 

You should have arrived from the talented Nichol Spohr, but if you get lost, no worries, there is a complete line up list below so you can stay on track during the blog hop. 

I'm beyond thrilled to share these two cards with you today, so let's get started.

It's so much fun to create shaker cards, so I decided to create one using the new Stitched Notes Die to create my background scene and love how the set comes with separated V shapes dies so they can be placed anywhere on the cardstock to create a unique cut.  

Also, I'm loving this fabulous Friends Forever set where it comes with four adorable little kids to choose from along with flowers and more. Plus, the sentiments are a perfect match. Here, I used the Coordinating Die to help me cut out all the images. 

Here, you can see, I was able to cut out some V shapes to add in some pink card stock and green for the bottom. To fill in this shaker, I used the new 6mm Fresh Garden sequin and was so excited to see these pink flowers also in the mix. 

To enclose the shaker, I used these beautiful Scallop Frames, from Pretty Pink Posh where you can create a wonderful frame around any scene. The cute little sun with smile is from the Camping Friends set and couldn't resist to use.

Moving onto the second card for the day....

Once again, I couldn't resist but to use the new Stitched Notes Die for this card as I do love how it leaves a dual stitching border. For this card, you can see the stitching on the Pink card stock and on the background scene card stock. 

Plus, I love how it comes with 3 little banners to play with. Here, I used one of them along with some pink card stock. 

This Easter Friends set is so much fun with the adorable little kids all dressed up, easter eggs, and baskets where I colored them using my copic markers. Also used the Coordinating die to help me cut them out fast.

To fill this little shaker, I thought the new 4mm Fresh Garden sequin was perfect as it has a mix of wonderful spring colors and thought it would be perfect to resemble smaller little eggs that you could shake.
  
Let's continue celebrating with your next stop at Amy Kolling 

GIVEAWAY! During this blog hop, there will be (4) $25 Gift Certificates to Pretty Pink Posh up for grabs (2) $25 Gift Certificates on each day

Winners will be picked randomly along the blog hop (comments must be left by 11:59PM PDT on 3/17/2017), and will be announced on the Pretty Pink Posh Blog


Here is the complete list of Blog Hop Participants:


 Thank-you so much for stopping by and continue enjoying the blog hop! 

SUPPLIES: